Today I will guide you on how to deploying MySQL 5.7 Database Server on CentOS 8 Linux. We will using Community Edition for this installation purpose, instead of MySQL 5.7 Enterprise Edition which force us to pay Oracle around $2000, $5000 and $10,000 for its MySQL Standard, Enterprise and Cluster Carrier Grade Editions. Since we’re community of great peoples, so we must using Community Edition for MySQL in order to get free and open-source DBMS system.
The guide is quite easy, you just need relax time to doing on this simple task. Make sure you have more relax time to perform this installation proccess.
PREREQUISITES:
* VPS / Cloud / Dedicated Server
* Distro with CentOS 8 Linux x86_64
* Server IPv4 Address
* Password Root
* gNome Terminal for Linux Desktop
* PuTTy SSH Client for Windows/Mac
1.) Run System Update
First of all, since this is freshly deployed machine, so we need to run system update to our virtual machine in order to get the latests software packages, including Linux kernel or security patches for our distro.
$ dnf update
2.) Edit File Repository MySQL Under /etc/yum.repod.d/
Then, we need to edit the files both mysql-community-source.repo and mysql-community.repo under directory /etc/yum.repod.d/
$ nano /etc/yum.repod.d/mysql-community-source.repo
$ nano /etc/yum.repod.d/mysql-community.repo
3.) Enable Repository Only for MySQL 5.7 Community Edition
After that, we should change variable from 0 to 1 for the following repository.
$ nano /etc/yum.repod.d/mysql-community-source.repo
[mysql57-community-source]
name=MySQL 5.7 Community Server - Source
baseurl=http://repo.mysql.com/yum/mysql-5.7-community/el/7/SRPMS
enabled=1
gpgcheck=1
gpgkey=file:///etc/pki/rpm-gpg/RPM-GPG-KEY-mysql
$ nano /etc/yum.repod.d/mysql-community.repo
# Enable to use MySQL 5.7
[mysql57-community]
name=MySQL 5.7 Community Server
baseurl=http://repo.mysql.com/yum/mysql-5.7-community/el/7/$basearch/
enabled=1
gpgcheck=1
gpgkey=file:///etc/pki/rpm-gpg/RPM-GPG-KEY-mysql
4.) Disable Appstream Repository for a while
We don’t want to get MySQL 8.0 installed on our machine, so we must disable appstrem repository on our CentOS 8 machine.
$ nano /etc/yum.repod.d/CentOS-Linux-AppStream.repo
[appstream]
name=CentOS Linux $releasever - AppStream
mirrorlist=http://mirrorlist.centos.org/?release=$releasever&arch=$basearch&repo=AppStream&infra=$infra
#baseurl=http://mirror.centos.org/$contentdir/$releasever/AppStream/$basearch/os/
gpgcheck=1
enabled=0
gpgkey=file:///etc/pki/rpm-gpg/RPM-GPG-KEY-centosofficial
5.) Run Cleanup and System Update Again
$ dnf cleanall
$ dnf autoremove
$ dnf update
6.) Install MySQL 5.7 Database Server (Community Edition)
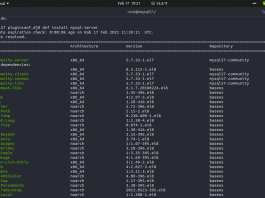
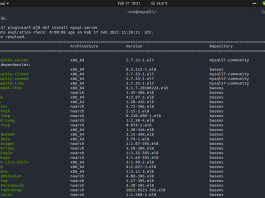
Let’s install MySQL 5.7 Community Edition using the following command.
$ dnf install mysql-server
7.) Start MySQLD Service
Then, start your MySQL 5.7 for the firts time.
$ systemctl start mysqld
8.) Login to MySQL CLI using mysqld temporary password
In order to get temporary password root for MySQL 5.7, we must run the following command.
$ grep 'temporary password' /var/log/mysqld.log
2021-02-17T11:42:13.258353Z 1 [Note] A temporary password is generated for root@localhost: 3<A<Uys.q:Q&
9.) Securing MySQLD Installation
After we’ve temporary root password for MySQL 5.7, we can securing our MySQL 5.7 installation. Simply using the following command.
$ mysql_secure_installation
Then, simpy using temporary password root for MySQL 5.7
Securing the MySQL server deployment.
Enter password for user root: [Input your temporary mysqld root password >>3<A<Uys.q:Q&]

The existing password for the user account root has expired. Please set a new password.

New password:

Re-enter new password:
... Failed! Error: Your password does not satisfy the current policy requirements

New password:

Re-enter new password:
The 'validate_password' plugin is installed on the server.
The subsequent steps will run with the existing configuration
of the plugin.
Using existing password for root.

Estimated strength of the password: 100
Change the password for root ? ((Press y|Y for Yes, any other key for No) : n

... skipping.
By default, a MySQL installation has an anonymous user,
allowing anyone to log into MySQL without having to have
a user account created for them. This is intended only for
testing, and to make the installation go a bit smoother.
You should remove them before moving into a production
environment.

Remove anonymous users? (Press y|Y for Yes, any other key for No) : y
Success.

Normally, root should only be allowed to connect from
'localhost'. This ensures that someone cannot guess at
the root password from the network.

Disallow root login remotely? (Press y|Y for Yes, any other key for No) : y
Success.

By default, MySQL comes with a database named 'test' that
anyone can access. This is also intended only for testing,
and should be removed before moving into a production
environment.


Remove test database and access to it? (Press y|Y for Yes, any other key for No) : y
- Dropping test database...
Success.

- Removing privileges on test database...
Success.

Reloading the privilege tables will ensure that all changes
made so far will take effect immediately.

Reload privilege tables now? (Press y|Y for Yes, any other key for No) : y
Success.

All done!
[root@mysql57 pluginconf.d]# mysql -V
mysql Ver 14.14 Distrib 5.7.33, for Linux (x86_64) using EditLine wrapper
10.) Try to Login to MYSQLD CLI using Actual Root Password
To verify that your MySQL 5.7 database server have been installed on your system, you can run the following command in order to login to MySQL CLI.
[root@mysql57 pluginconf.d]# mysql -u root -p
Enter password:
Welcome to the MySQL monitor. Commands end with ; or \g.
Your MySQL connection id is 6
Server version: 5.7.33 MySQL Community Server (GPL)

Copyright (c) 2000, 2021, Oracle and/or its affiliates.

Oracle is a registered trademark of Oracle Corporation and/or its
affiliates. Other names may be trademarks of their respective
owners.
Type 'help;' or '\h' for help. Type '\c' to clear the current input statement.

mysql>
---------------------------------------------
CONCLUSION
Installing and configuring MySQL 5.7 Community Edition on CentOS 8 Linux is quite easy and simple. Just prepare more relax time to doing this simple task. Don’t focus on your server, but you must focus on your coding app.
Thank you and Happy Coding… 🙂


